
Since the release of the AI image generating programs at the beginning of 2023, Midjourney has become a fan favorite for its ease of use and spectacular images.
And while Midjourney has been the leading image generator in the aesthetics department, its lack of an outpainting feature that many of its competitors, like Dall-E 2 and Stable Diffusion, have had for a long time, has been a thorn in the side of its users.
The good news is that Midjourney V5.2, which was released at the end of June, came with a new set of “Zoom” features. Although these new tools are not technically the same as outpainting, they are a significant stride in rectifying that omission of the previous versions.
In this article, we are going to show you how to use Midjourney Outpainting, aka the new Zoom tools, and go over some of their limitations.
We’re also going to share a couple of tricks to make the best use of these tools and get around a few barriers.
Can You Outpaint All Images Using The Midjourney Zoom Tools?
In short – no.
The new Zoom tools can be used on any images that you have created in Midjourney, as long as they are still accessible on your Discord account. This also includes any images you’ve created before the release of the new tools.
The new tools do not work with pictures you have saved on your computer or images uploaded from the web.
But, we have a work around for that, so keep reading!
How to Use Midjourney Outpainting and Zoom Features
Zoom Out
The first new Midjourney feature is “Zoom Out”, which comes with two settings: Zoom Out 1.5x and Zoom Out 2x.
Rather than enlarging the image and “painting out”-side the image borders, the Midjourney Zoom Out function works more like adjusting camera lens, making your focal point smaller and ‘bringing in’ the unseen outer edges into frame.
You’ll be able to capture more of the environment around your subject while still maintaining the core part of your original image. Essentially, it widens your field of view in the same frame, as it would if you were looking through a camera lens and zoomed out.
It’s important to note two things about the Zoom Out Feature:
- It does not make your image bigger
- It does not change the resolution
Now that said, if your focal point is smaller than in the original image after it’s been zoomed out, you are going to lose some detail.
How to Use Zoom Out
We’re going to show you how to use each of the functions step-by-step, with visuals. So come along and we’ll do this together.
Step 1: Generate an image in Midjourney.
PROMPT: photograph of a young woman working in a cafe on her laptop, using ear buds, looking calm and reflective, close up


Step 2: Upscale Your Target Image
Once you’ve settled on a particular image from your 4-image grid, upscale that image using the upscale button that corresponds to the image that you want.
I chose U1.

You’ll now see a new set of buttons will pop up below your upscaled image. If you didn’t assign an aspect ratio to your image prompt (like my prompt above), then your output will default to a square image and you will see only 3 buttons:

If you did assign an aspect ratio to your image prompt, like –ar 2:3 or –ar 16:9, you will end up with a rectangular image, in which case you will see 4 buttons:

Right now we are just going to talk about the first two buttons that are named “Zoom Out 2x” and “Zoom Out 1.5x.” And as the names suggest, they will zoom your image out by a factor of 1.5 or 2 times.
We’ll explain the other buttons a little further down, so keep reading!
Step 3: Select a size to zoom out.
For the sake of demonstration, I zoomed out once from the original image size with each button to show you the difference.

As you can see, Zoom Out does not make the image bigger, nor does it increase or increase the resolution. The Zoom Out function just widens the field of view the same way it would when zooming out using a camera, or using a camera with a wider lens.
Regardless of the zoom out level you choose, the images remain the same resolution at 72dpi and the same size at 1024 by 1024 pixels.
Midjourney’s Zoom Out function doesn’t make your image bigger; it just fits more content into the same space.
Custom Zoom
Custom Zoom using the –zoom parameter
The custom –zoom parameter lets you specify the zoom level with decimal values between 1 and 2, offering more control and flexibility to advanced users.
Simply put, as opposed to being limited by only 2 zoom out sizes (1.5x & 2x), the custom zoom feature allows you to specify the specific –zoom level of your image anywhere from 1.1x to 2x if you require some extreme fine tuning.
After upscaling click the custom zoom button. The prompt box will pop up. Add the –zoom value to the end of the prompt.
If your original prompt was:
/imagine a rustic cabin on a lake
Then simply add the specified zoom out level.
/imagine a rustic cabin on a lake –zoom 1.7
This works just like the regular Midjourney Zoom Out buttons, except that you assign it custom value.
Custom Zoom using the –zoom AND –ar parameter
Not only can you use the custom zoom to specify the zoom out level, using the –zoom parameter, you can also add an –ar parameter to assign an aspect ratio to change the dimensions of your image.
You can make a vertical image horizontal, or a square image vertical by simply adding an –ar parameter.
Getting Creative with Custom Zoom
Now, you can leave it up to Midjourney to render its own interpretation of what it thinks should fill in the missing space.
In the images above, using the zoom out feature, it did a great job of creating a whole café that you’d never guess wasn’t part of the original image to begin with.
But if you want to add something specific to the background of your image that you are zooming out, or maybe you would like to put your subject in a different setting, this is where the custom zoom function becomes a lot of fun.
How to Use Custom Zoom
PROMPT: a close up portrait of 21 year old Indonesian model, high definition, highly detailed
Note: see our article on Midjourney Prompts for Portraits for more details on portrait prompts.
Step 1: Generate an image in Midjourney.

Step 2: Once you’ve settled on a particular image from your 4-image grid, upscale that image.
I chose U2.

STEP 3: Click the Custom Zoom Button
You will see the Custom Zoom button – click it. Then add a description to the end of your original prompt (before the parameters) about how you want the background to look. Then add the aspect ratio and zoom level parameters.
To make a vertical image, the second number needs to be higher than the first, ex: –ar 3:4
Your new prompt should now look something like this:
PROMPT: a close up portrait of 21 year old Indonesian model, high definition, highly detailed, wearing a flowing summer dress, standing on the beach at sunset –ar 4:5 –zoom 2

You can also create a horizontal image.
When assigning an aspect ratio, remember that the first number always refers to the width and the second to the height of the image. So, for a horizontal image, the first number will always be higher than the second.
PROMPT: a close up portrait of 21 year old Indonesian model, high definition, highly detailed, in a tropical garden with lots of flowers –ar 16:9 –zoom 2

Just note: the Custom Zoom function doesn’t make your image a higher resolution.
To give you an idea of how it resizes photos when you change the aspect ratio when using the custom zoom, the following images are scaled to size to show you the before and after proportions of your image, using the parameters above.

Make Square
And finally, we have Midjourney’s new “Make Square” feature.
It isn’t exactly an outpainting tool, but it’s as close as Midjourney comes by taking non-square images and adding new context around the original composition to make it square.
Unlike the Zoom Out function, which decreases the size of the original composition to widen the view in the same frame, Make Square “uncrops” your picture and adds more to the image.
It doesn’t ‘stretch to fill’. It fills out the area around the existing image.
Keep in mind that this feature only works with pictures that aren’t square. By default, unless you specify an –ar parameter, Midjourney automatically renders square images from a prompt. This is why the Make Square button doesn’t show when your image is already square.
However, in the event you’ve created an image using an –ar parameter that you really like, and now you want to reuse it for a different application in a square format, then “make square” can turn any rectangular image into a square image.
How to Use Make Square
Step 1: Start by generating a non-square image using the aspect ratio parameter.
PROMPT: A lighthouse in the North Atlantic being battered by giant North Sea waves. Cinematic, insane detail, Realistic, water effects, with strong lightning –ar 2:5

Step 2: Upscale Your Image
Once you’ve settled on a particular image from your 4-image grid, upscale that image.
I chose U1.

Step 3: Make It Square!
Once you’ve upscaled your image, you’ll see a “Make Square” button below the image.
Click the button and watch as Midjourney fills in the chosen image white space, creating a new grid of 4 square-shaped images.

How To Outpaint Images You Didn’t Create in Midjourney – Workaround
Remember how we mentioned that one of the limitations of the new Zoom tools was the fact that they can only be used on images created in Midjourney?
Well, we have a workaround that may help.
Let’s say you have a photo you want to use for your website, but it’s the wrong size. You won’t be able to use the zoom tools on that photo, but you can upload the photo and recreate it using the /describe function.
The /describe function reverse-engineers an image you upload by extracting information from it and generating prompts based on the image so you can use the prompt to recreate the image in Midjourney.
Step 1: /describe your image
Type /describe into the text box. You’ll see the command box pop up with the word image beside it. Either click on ‘image’ to upload an image from your computer, or you can just drag and drop an image into that window.

Step 2: Process the Image
Once you’ve selected your photo and you can see it in the window, hit enter. Midjourney will then process your image and give you four different text-rich prompts, based on what it picked out of your image.

Step 3: Choose the Best One of the Generated Images
Now that you have your prompts, simply choose the one you think will work best and click the button with the number that corresponds to the prompt.
When you click the number, a box will pop up with the prompt that you can edit.
Note: You can also click the “imagine all” button and it will give you four images based on each prompt, but it will not allow you to edit the prompts.

I just wanted to see what the prompt would come up with first, so I just clicked ‘submit’ and waited to see.
Full disclosure – the describe feature doesn’t always work very well, depending on the content and the complexity of the image.
Results will vary considerably.
The image you get when using the /describe prompts will never be exactly the same as the image you uploaded. You may have to tweak it several times to get something you can even work with.
And sometimes it’s not even close.
But sometimes you end up with a variation of your image that was even better than the original, if you’re lucky.
I chose prompt #4.
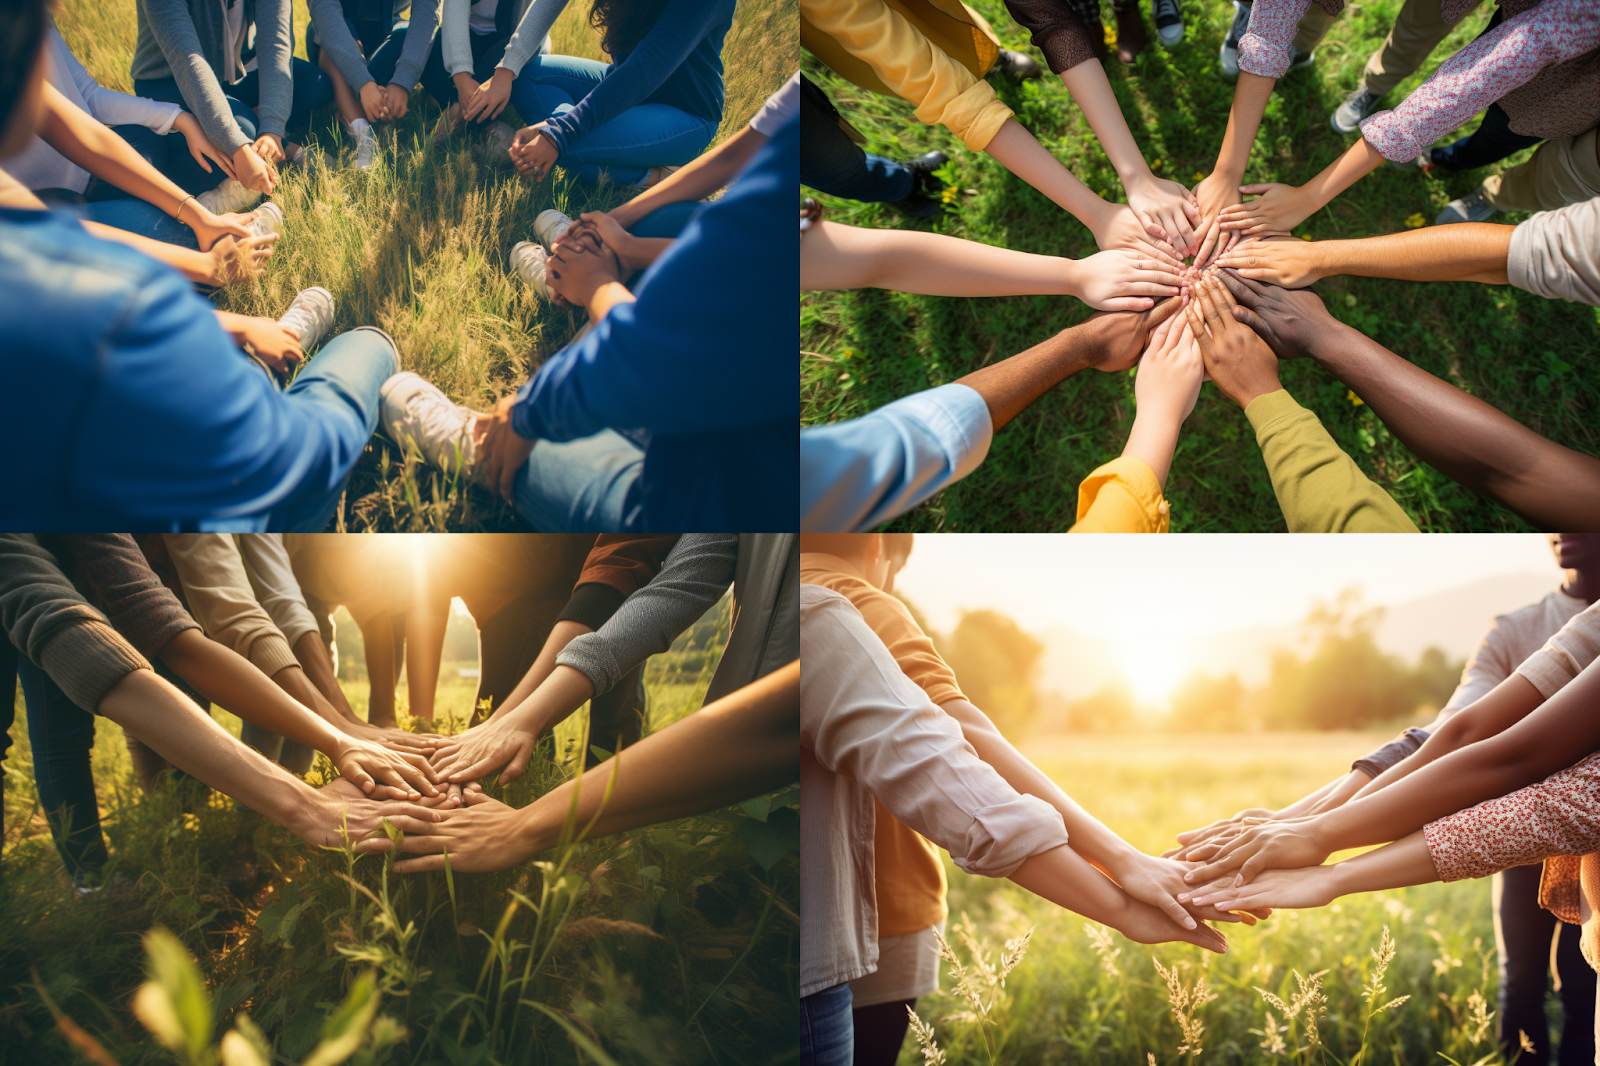
This is what I got the first time around:

All things considered, not a bad rendering, but not exactly what I wanted.
I thought image #2 was closest to the original, except the people seem to be standing in the sand rather than sitting on grass, like in the original image.
So I went back to the original uploaded image with the prompts and clicked the #4 prompt again, only this time, I tweaked the prompt to read:
group of people holding hands in a circle, sitting in the grass, stock photo, in the style of site-specific work, uhd image, ethical concerns, chicano-inspired, poetcore, furaffinity, villagecore –ar 128:85
And this is what I got:
Step 4: Upscale Your Re-creation
Now that you have a reasonable recreation of your original image, go ahead and upscale it.

And now you have all of the new zoom out functions that you can apply to your image.
Take Away
Outpainting has consistently topped the list of user requests for Midjourney (along with the ability to create consistent characters). And while the newly introduced Zoom tools aren’t quite outpainting by definition, they represent a substantial step towards fulfilling this demand.
With Midjourney’s ongoing evolution to cater to its users’ needs, it’s clear that the future of AI-generated imagery holds even more exciting possibilities on the horizon.


